
iPhone shortcuts you may not know about
Most modern iPhones come with shortcuts to help make your life even easier.
Most modern phones come with shortcuts to help make your life even easier.
Who doesn’t like a cheeky shortcut! From voice commands, to keeping your messages private, to having a quick way to put your torch on and more.
We explore some Android shortcuts you may not know about.
For Android users, you can turn your phone’s torch / flashlight on by shaking your phone!
To do this you’ll need to install the Shake Flashlight App. Then, you can simply shake your phone and the Flashlight will turn on, then just shake it again to turn the Flashlight off.
Remember - this is a torch, although the light is small it can be powerful, so please do not shine it directly at people!
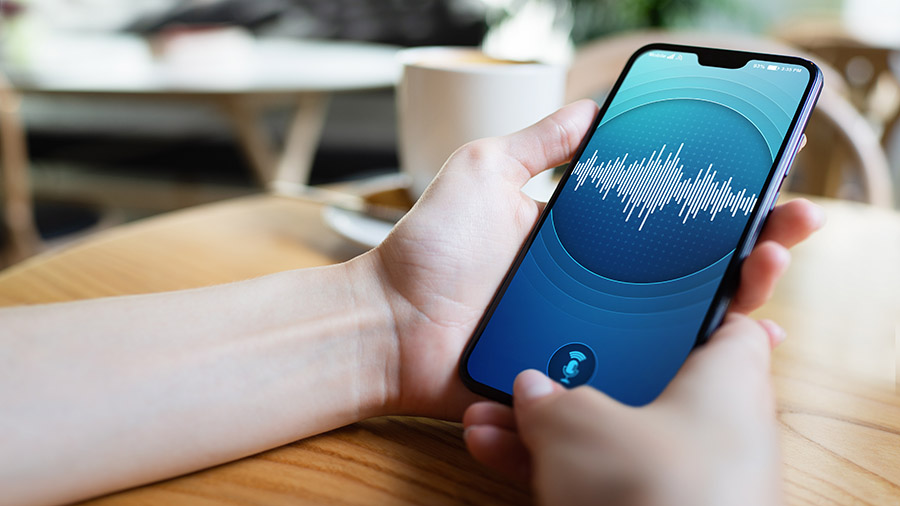 Search for a widget named ‘Sound Search’, this acts as a shortcut to Google Assistant’s ‘what’s this song?’ feature.
This means that instead of saying “Ok Google”, and saying the command to try and catch the remainder of the song that is on, you simply tap the Sound Search widget to find out what it is you're listening to.
Sometimes a quick glance at your notifications can be handy, however when you’re out and about you may want to keep your notification private especially if it contains something sensitive.
This setting is easy to enable, tap the cog icon (Settings) then head to Notifications. Once here you can choose your notification pop-up syle.
To hide your notification content, look for ‘lock screen notifications’ (or something similar).
Within this setting you can choose:
- How a message is displayed - Icons only on Details
- Show on Always On Display
- ‘Hide content’, meaning a notification will pop up, but the content will not be displayed until the phone is unlocked.
Head to the Home screen and wallpaper in your Settings, or it could be in the security options on your phone.
Once there, enter a ‘lock screen signature’, this will be displayed on your phone so if you did lose your device, someone may call if you put a phone number on your lock screen.
You can set a sleep schedule on your phone, which can prompt you to get to bed and wake up on time.
Head to the ‘Clock’ app and tap Bedtime, you may need to hit the three little dots in the right hand corner. Select ‘bedtime and wake-up time’ and follow the prompts to set your bedtime schedule and to set the wake-up time too.
By setting this, your phone can turn on Do Not Disturb, slicing notifications or calls. Perhaps helping you get better sleep.
You can also track your or your kids screen time, you can set limits or timings to help find a better balance.
Simply head to Settings > Find Digital Wellbeing, here you can view your screen time, set app timers and even activate ‘Wind down’ mode to help reduce eye strain.
This lets you put your phone into “Do Not Disturb” mode whilst letting the notifications that you selected come through.
You’ll find this in Settings then Sound & Notification -> Do Not Disturb, from here you can change the settings and notifications that you still want to receive.
 Wanting to capture a special moment? Don’t fuss with unlocking, then launching your camera app.
Instead you can double-tap the device’s power button to get straight to your camera, whether or not your display is on.
If your Android phone is older than 2017, you may need to use the physical Home button instead of the power button.
If it still doesn’t seem to work, try searching for ‘gestures’ to see if it is available and may require you to toggle the function on.
Alongside hiding your notifications, you can customise your message notifications with Android 11.
The Google Pixel 3 phone or newer, Samsung S10s and above, also the Samsung Galaxy A52 and A72 all run on Android 11.
You can set messages to appear on top of any running apps as bubbles.
Head into your Settings and set the contact to Priority, within a notification there is another setting for ‘Bubbles’ with three options: ‘All conversations can bubble’, ‘Selected conversations can bubble’ or ‘Nothing can bubble’.
Handy feature to have on if you’re out and about, enabling Find My Device can help you find, lock or even erase your phone. This feature is also useful as you can connect to friends and family and see where they are.
In settings you’ll see Security - Find My Device and make sure Find My Device is turned on, you'll also need to make sure your location is on and that you’re signed into a Google account.
When a friend needs to borrow your phone or you allow your kid(s) to play a game on your phone, you can lock your screen to that particular area.
Head to Security & Location and turn ‘Screen pinning’ on. Once this is turned on, head to the app that your friend or loved one needs to use. Open overview with the square button below the phone screen.
You should see an icon that looks like a pin in the lower right corner. Tap it and it’ll remain pinned to the front. To get out of this pinned screen, simply enter your phone’s lock screen code or pattern.
Android's dictionary keeps track of words you type that may not be recognised as being spelt properly, unrecognised words are highlighted on the screen. Sometimes the word(s) are shown in a different colour, or on a different background, they also may be underlined in red.
You can add these words into the dictionary by tapping the word and choosing ‘Add to Dictionary’.
Also to review or edit the dictionary head to your cog icon (Settings) then choose System -> Languages and Input. Once here choose Virtual Keyboard -> GBoard and find Dictionary then Personal Dictionary.
 First, you need to make sure you have Gesture Navigation turned on.
Google Pixel users can find this by opening Settings -> Scroll to find System settings then look for Gestures. Once you found this then select System navigation from the options -> then tap on Gesture Navigation
Samsung phone? Tap the cog icon (settings) -> Scroll to find Display and open Navigation bar -> Swipe gestures -> Then tap ‘More options’ underneath this and you’ll find different options to select: bottom; ignore it, and select Swipe from sides and bottom.
Once enabled, all you have to do is flick your finger toward the right along the bottom edge of the screen to snap back to your most recently used app.
Want to go back to the other app you were using?
You can flick from the left or the right edge of your display, and an arrow should pop out, then release your finger. You can do this from any point along the entire length of your screen, and if you need to, you can adjust the sensitivity in gesture settings.
Setting your phone to read your screen aloud is great if you need to be hands free or have difficulty reading the screen.
If you have a Samsung phone, you can enable this through your cog icon > Accessibility > Screen reader, once here tap the switch next to ‘Voice Assistance’. Please note, you may be asked to allow Voice Assistant the permissions it needs to function.
If your phone starts ringing, don’t panic, it's supposed to do that…occasionally!
If you can’t, or just don’t want to pick up, look towards the bottom of the screen for an icon that may say ‘reply’ or ‘send a message’. Tap this and you should be presented with a list of ready-made messages that you can send to the caller whilst declining the call.
You even have the option of creating your own message within the Phone app’s settings.
You can use Google Photos to help you clear any photos or videos that you’ve already backed up to the Cloud.
Launch Google Photos and tap the main menu button, found in the top-left corner of the screen, then hit ‘Free up storage’.
Photo fanatic? Consider having this action as a shortcut. All you need to do is tap and hold the Google Photos icon on the home screen, then tap the Free up space app shortcut.
Handy for those of us who are forgetful, or simply have a lot going on.
All you have to do is tap and hold the calendar home screen icon, then tap the ‘New reminder’ shortcut. Once you’ve done this a blank reminder will show where you can input whatever you need reminding about.
If you are adding third-party shortcuts you may have to manually allow these and grant access and permissions that help the app(s) function. Take care to view and edit any of the shortcuts you add, and make sure you’re downloading genuine shortcuts from Google Play Store.
As all apps use various data and permission, you can always check, view and edit which apps have been given permissions, and what these may be i.e. access to your Camera or Contacts etc. by heading to your Settings (cog icon) then Privacy.
Now you're a shortcut wizard, you’re bound to be even more attached to your phone. Why not consider protecting your phone from accidental damage, breakdown and more. It’s simple to get a quote and buy online for instant cover.
Instant protection for your Android phone
